[Home]


2011 COG Elevator AD Page


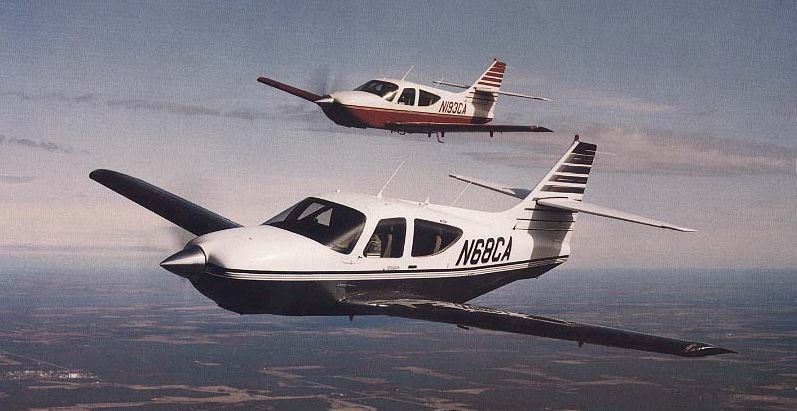
Thank you for visiting the Commander Owners Group's page dedicated to investigating the problems associated with the elevator spar AD recently issued for the Commander.

Documents (requires Adobe Acrobat for viewing):

FAA AD 2011-17-13

AMOC for AD 2011-17-13 and Revision 1 (please donwload both for reference)

   AMOC Revision 1, clean copy (color pictures w/o official FAA stamp) 

Background: Over the first few months of 2011, several 114's have been found with cracks in the spars around the elevator hinge areas. After the FAA issued the actual AD mandating an inspection, more aircraft were found with cracked spars including some 112 models. In order to help the COG gather more data about this issue and assist us with working with the FAA on developing reasonable inspection methods and hopefully a terminating action, and in the interest of the safety of all our members, we've put together this page to accomplish the following:

  • Gather data to help spread the word about what we know about the issue thus far.

  • Deliver a suggested procedure that your mechanic can use to check your aircraft including some steps not specifically called out in the AD. The additional step are intended to help shed light on the underlying cause of the cracks being found.

  • Provide a mechanism for centrally collecting the results of what each member finds so that we can work with all interested parties in better understanding the issue and next steps.

We will make all collected data available to each member and Commander Premier who has requested a copy of what we find.

Here's what we'd like you to do:

  1. Download the below Elevator Spar Inspection Guide and Report by clicking the link below. The Guide explains exactly what the problem is and a suggested procedure for checking your aircraft. We suggest you print and hand the Guide to your mechanic. (Thanks to Jim Richards at Aerodyme for supplying the material in the Guide)

              Elevator Spar Inspection Guide and Report (200K) Requires Adobe Acrobat

  1. After your mechanic performs the check on your aircraft, please have them fill in the requested information in the Guide. Note that we want to hear from you regardless of what is found. This is very important as we want to get as many results back as possible to help determine possible causes.

  2. With the Guide in hand, come back to this page and enter the result in the table below. If your shop or you don't have time to fill in the online form, please either fax the results to us at 978-921-0950 or scan the Guide and email to us at survey@commander.org

As we gather data we'll make it available in the forums on a periodic basis. Thanks in advance for helping your fellow owners!


Post-check Report
(Do not hit 'Enter' when typing or form will be submitted. Use Tab & mouse to move between fields)

please report any problems with this form to the

Your Aircraft Information

1.

Model Year

2.

Aircraft model

3.

Serial number

4.

TTAF

hours

4b. Any record of ownership by/or leaseback to a flight school?   Yes   No

5.

Current Prop

2-blade   3-blade

6.

Engine Conversion

none 
Hot Shot 
Camarillo 
390 Super
580 Super

Time Engine Conversion Installed

   tach  hobbs date

7.

Was Service Bulletin SB-112-56B or SB-114-12B complied with?

Yes   No

8.

If above SB complied with, enter time & date

tach  hobbs
date

9.

If above SB was complied with, describe rivet pattern

Single row
Single row plus aft only
Single row plus half row
Two full rows

10.

Was Service Letter SL-112-46 or 114-17 complied with? (note: the COG encourages you to review the rudder inspection portion of this SL)

Yes   No

11.

If above SL complied with, enter time & date

tach  hobbs
date


Empennage Maintenance, Replacement or repair Entries
(Report only the most recent. Leave blank if not logged)

12.

Elevators mentioned

  tach   hobbs
Damage History

13.

Replacement of Elevator Hinge Bushings/Bearings

  tach   hobbs
Left Side  Right Side

14.

Trim Tabs mentioned

Left   Right

15.

Replacement of Trim Tab Rod Ends

Left   Right

16.

Trim Jackscrew Service

Left   Right


Evaluation of Play in Horizontal Tail

17.

Left, more than 1/8" total movement in Trailing Edge?

Yes   No   DNI (did not inspect)

18.

Right, more than 1/8" total movement in Trailing Edge?

Yes   No   DNI

19.

Left Elevator Hinge Play

Outboard

OK   Audible   Felt   Visible 
DNI

Mid

OK   Audible   Felt   Visible
DNI

Inboard

OK   Audible   Felt   Visible
DNI

20.

Right Elevator Hinge Play

Outboard

OK   Audible   Felt   Visible
DNI

Mid

OK   Audible   Felt   Visible
DNI

Inboard

OK   Audible   Felt   Visible
DNI


Left Trim Tab

21.

Trailing Edge, more than 1/8" total movement?

Yes   No   DNI

22.

Outboard Rod End

OK   Felt   Visible   DNI

23.

Inboard Rod End

OK   Felt   Visible   DNI

24.

Actuator Jack Screw

OK   Felt   Visible   DNI


Right Trim Tab

25.

Trailing Edge, more than 1/8" total movement?

Yes   No   DNI

26.

Outboard Rod End

OK   Felt   Visible   DNI

27.

Inboard Rod End

OK   Felt   Visible   DNI

28.

Actuator Jack Screw

OK   Felt   Visible   DNI


Elevator Push Tube

29.

Play at Elevator Push Tube - Upper Bearing

None   Audible   Observable (viewable through the elevator horn port)

30.

Play at Elevator Push Tube - Lower Bearing

None   Audible   Observable


Torque Check of Attachment of Outboard Elevator Fitting to Elevator

31.

Left Upper Outboard

OK   Rotates   DNI

32.

Left Upper Inboard

OK   Rotates   DNI

33.

Left Lower Outboard

OK   Rotates   DNI

34.

Left Lower Inboard

OK   Rotates   DNI

35.

Right Upper Inboard

OK   Rotates   DNI

36.

Right Upper Outboard

OK   Rotates   DNI

37.

Right Lower Inboard

OK   Rotates   DNI

38.

Right Lower Outboard

OK   Rotates   DNI


Special Inspection Results

39.

No Defects Found

Left   Right

40.

Crack Along Upper Edge of Fitting, and Length (inches)?

left      right

41.

Crack Along Lower Edge of Fitting, and How Long?

left      right

42.

Crack Beyond Inboard Edge of Fitting, and How Far?

left      right

43.

Crack Beyond Outboard Edge of Fitting, and How Far?

left      right

44.

Crack Starting/Ending at Bolt Holes, How Many?

left      right

45.

Crack Visible by External Inspection of Elevator

left   right

46.

Crack Visible by Internal Inspection of Elevator

left   right

47.

Crack Visible Only by Dye-Penetrant Inspection

left   right

48.

Other Defect (please describe)

49.

Please add any relevant comments or notes

50.

If you have any pictures of the damage that you were able to take, please upload here:

51.

May we contact you if there are any questions about this data? If 'yes', please enter your contact information to the right.

Name
Email
Telephone


Hit Counter

Questions or problems regarding this Web site should be directed to webmaster
Copyright © 2003 Commander Aircraft Owners Association. All rights reserved. Legal Notices.